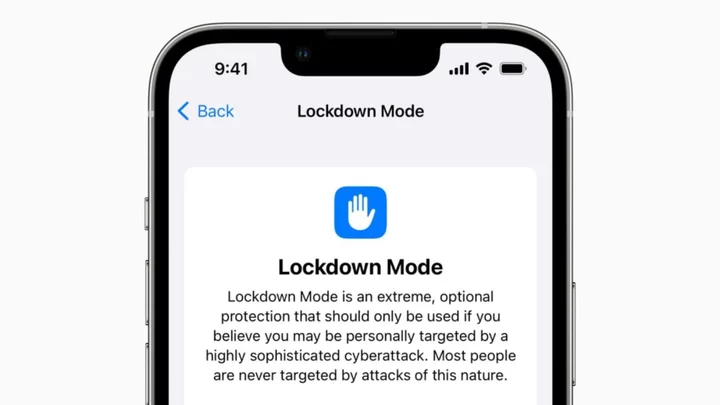
The average iPhone owner should not have to worry about a coordinated cyberattack against them. But in some cases, cybercriminals and other parties will deploy targeted attacks against specific individuals, including government officials, human rights advocates, and journalists. Apple's Lockdown Mode allows victims to respond in kind to protect themselves.
Available for iPhone, iPad, and Mac, Lockdown Mode was introduced with the release of iOS 16, iPadOS 16, and macOS Ventura. This optional feature effectively disables or restricts certain features and settings on your device. The goal is to prevent malware, spyware, and other threats from exploiting or compromising your personal information.
Though Apple stresses that most people should never have to take the drastic step of enabling Lockdown Mode, knowing how to use this feature is important in case you are in a group or profession that could be targeted by spyware and other threats.
What Does Lockdown Mode Do?
Lockdown mode received attention in 2022 when it thwarted an attack on a human rights group from spyware vendor NSO Group. The PwnYourHome exploit was able to secretly infect the Apple Messages app and tamper with Apple’s HomeKit software. But users with Lockdown Mode enabled received warnings and were able to avoid becoming victims.
So what does the feature actually do? According to Apple, enabling Lockdown mode affects specific apps and features in the following ways:
Messages: Other than certain images, video, and audio, most types of message attachments are blocked. Links and link previews, among other features, will also not work. Phone calls, plain text messages, and SOS emergency calls will continue to work.
Web browsing: Certain complex web technologies are blocked, an action that could cause some websites to run slower or not work at all. Web fonts will also not display and images may not appear.
FaceTime: All incoming FaceTime calls are blocked unless you have already called the person on the other end.
Apple services: Apple's own services are limited so that incoming invitations, such as those to manage a home in the Home app, are blocked unless you have previously invited that person.
Shared Albums: Shared albums are removed from the Photos app, while new Shared Album invitations are blocked. You can still view shared albums on other devices that don’t have Lockdown Mode enabled. After turning off Lockdown Mode, you will need to turn on Shared Albums again in your device settings.
Device connections: To connect your iPhone or iPad to an accessory or another computer, the device will need to be unlocked. To connect your Mac laptop with an Apple chip to an accessory, you need to unlock your Mac and explicitly approve the action.
Configuration profiles: You cannot install configuration profiles or enroll your device in Mobile Device Management or device supervision.
Enable Lockdown Mode on an iPhone or iPad
In order to enable Lockdown Mode on your mobile device, you must be running iOS 16 or iPadOS 16. Open Settings > General > Software Update to check. You'll be told that your OS is up to date or prompted to install the latest update.
To turn on Lockdown Mode on an iPhone or iPad, go to Settings > Privacy & Security. Swipe down to the bottom of the screen and tap the Lockdown Mode option. Tap Turn On Lockdown Mode to get things started.
The next screen will go over how Lockdown Mode will affect your device. At the bottom, tap Turn On Lockdown Mode. A confirmation message pops up asking if you want to confirm. Tap Turn On & Restart and enter your passcode to make your iPhone or iPad restart.
Sign back in to your device to see what features and functions are disabled or restricted with Lockdown Mode is in effect. As you can see, Screen Time will stop working, certain message will be unable to open, and incoming FaceTime calls will be blocked.
When you are ready to turn off Lockdown Mode, go back to Settings > Privacy & Security and tap Lockdown Mode. Tap Turn Off Lockdown Mode and then tap Turn Off & Restart. Enter your passcode to restart your device.
Once your device has been restarted, sign back in and see that the features that were once disabled or limited are now working properly again.
Enable Lockdown Mode on a Mac
To try Lockdown Mode on your Mac, make sure you are running macOS Ventura or higher. To update from a previous version, click the Apple menu icon and select About this Mac. Click the button for Software Update and then click the Upgrade Now button.
To enable Lockdown Mode, go to System Settings and select Privacy & Security. Scroll down the screen and click the Turn On button next to Lockdown Mode. Confirm the action with your password or Touch ID, then click the Turn On & Restart button.
Sign back in to your Mac to see that many of the features on your computer have been restricted or disabled completely. For instance, you can't open certain messages while in Lockdown Mode.
To turn off Lockdown Mode, go back to System Settings > Privacy & Security. Scroll down the screen and click the Turn Off button next to Lockdown Mode. Confirm the action with your password or Touch ID. Then click the Turn Off & Restart button.
Sign back in to see that the features and actions that were restricted by Lockdown Mode have now been lifted so everything should now work as intended again.

